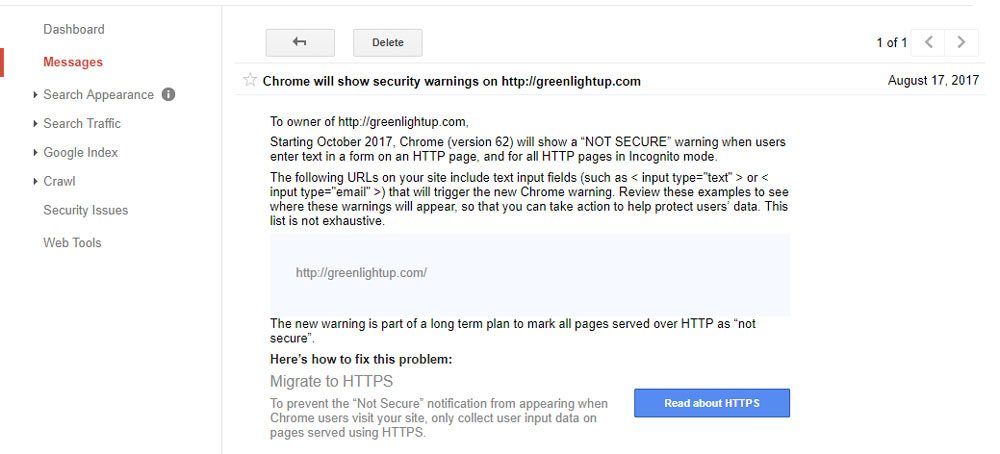
Last month many users of Google’s Search Console received emails notifying them of a change in how their sites would appear in Google Chrome starting this month. If you were one of them, there is a pretty good chance you were alarmed, or at least confused, by the email. While this specific notification is for Google’s Chrome browser, historically Mozilla, who makes the popular Firefox web browser will probably do something similar.
Last year Google started giving a modest bump in search rankings to sites that are served securely with the https:// protocol as compared to similar sites served insecurely with the http:// protocol. Additionally, Google has also started carrying over SEO history when a site changes from http:// to https://.

Even if you didn’t receive that notification, you might have read any of the hundreds of articles from the last 6 months encouraging you to convert your site over to Secure HTTP (or HTTPS) . Both stem from the same push, especially by Google, to increase security across the web by encouraging everyone to use SSL certificates and secure connections.
If you’re not sure what SSL or HTTPS are or you are looking to move from HTTP to HTTPS and install a SSL certificate on your WordPress site, this post will explain what you need to know and how to manage the transition.
What happened?
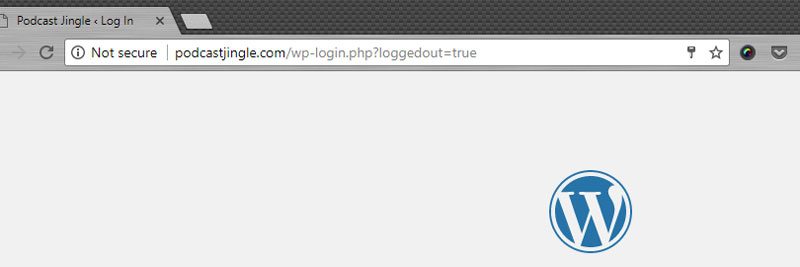
Before last month, Google was taking a more behind the scenes approach and simply boosted the impact of the HTTPS as a ranking signal for search. Now however, they’ve started visibly warning users of Google Chrome when a site isn’t using HTTPS by adding a “Not Secure” warning next to any sites that request information (for example a form, or a login) and do not have a SSL enabled.

What is HTTPS and SSL?
In the past, unless you operated a site that exchanged financial information, like an ecommerce site or banking site, you were using the standard, non-secured HTTP protocol. A secure connection was really only required for sites that needed to protect the transfer of sensitive information like credit card numbers or banking credentials.
That’s where HTTPS—as the secure version of HTTP—comes in; it uses an SSL certificate issued by a trusted third-party to verify the server you’re connecting to and encrypt the transferred data between your browser and the server. This way, whether we’re making a purchase or simply logging in, it is much harder to intercept the personal information between the browser and the server.
What are SSL certificates?
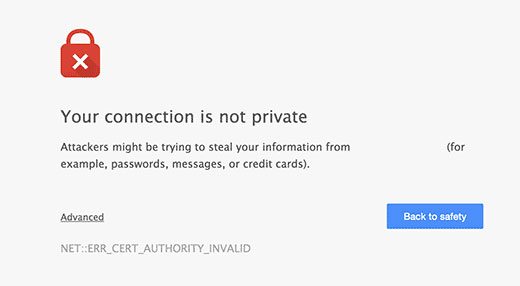
 In order to uniquely identify the site, each site is issued a unique SSL certificate by companies like Comodo or Verisign, which must be installed on the hosting server. A site using HTTPS with a certificate that doesn’t match will trigger a warning in most modern browsers that will encourage you to leave the site:
Our Recommendation
While Google is not directly penalizing rankings for non-HTTPS sites, the nature of the warning (i.e., “This site is not secure.”) suggests many users may not feel comfortable on your site and you are likely to see a drop in traffic. In order to prevent any potential issues stemming from this change, we wholeheartedly recommend making the switch to HTTPS.
How can I convert my site to HTTPS and SSL?
For simplicity’s sake, we’re assuming your site is built with WordPress. This isn’t to say you have to use WordPress, but almost all the sites we manage at Baker Labs are WordPress-based sites and more than 25% of the internet is built on WordPress. Not to mention, many of these steps will carry over to different platforms.
What is required?
The only requirement is an SSL certificate. Beyond the certificate, there are several ways to enable HTTPs from manually configuring WordPress to installing a simple, free plugin. Either way you need an SSL certificate for your domain installed on your hosting server. Depending on how your site is hosted, you may have access to a free SSL certificate in your hosting account settings or you may need to purchase an SSL certificate. Login to your hosting account and look for a section with SSL or Certificate settings. This section is most likely where you will find information on any included SSL certificates and setting them up on your account. If your hosting provider doesn’t offer free SSL, chances are you can purchase one from them for $50- $200. Otherwise, you may need to find a third-party provider, like GoDaddy, and have your hosting provider install in on the server that hosts your site. Your provider may charge a small fee (around $10), but this process is usually straight-forward and simple.
Configuring Your WordPress Site to Use HTTPS
Once you have purchased and installed your SSL certificate you’ll need to make some configuration changes to WordPress in order to use HTTPS. You could manually make all these changes, but it’s much simpler to utilize a plugin as most plugins automatically make all the necessary changes.
We recommend and use Really Simple SSL as it requires very little additional setup beyond installing the plugin and activating it, but it allows you to view the configuration behind the scenes. It automatically detects the installed SSL certificate and makes the necessary changes to your .htaccess file to redirect visitors to HTTPS versions of your pages. All you have to do is make sure your WordPress Site Address under Settings is using HTTPS.
Checklist – Don’t Miss These Crucial Elements
After completing the HTTPS/SSL setup for your site, don’t forget a few crucial elements:
- Update your sitemap to include the new HTTPS urls and resubmit
- Make sure you update your site URL in Google Analytics
- Make sure you verify and update your HTTPS URL in Google Search Console
- Update any social media accounts or other integrations to use the HTTPS url
If you’ve read this far and you’re thinking converting your WordPress site to HTTPS and SSL isn’t as difficult as it seemed, now is the time to make the change! On the other hand, if you would rather let the pros handle it, we can help. Contact us today to discuss moving your site to HTTPS and SSL.
[cta id=’1998′]


